Thursday, August 26, 2010

Paint type things

Hey!  Look at this!  2 posts in a week!  We're on a roll.  I'll try to keep it up.

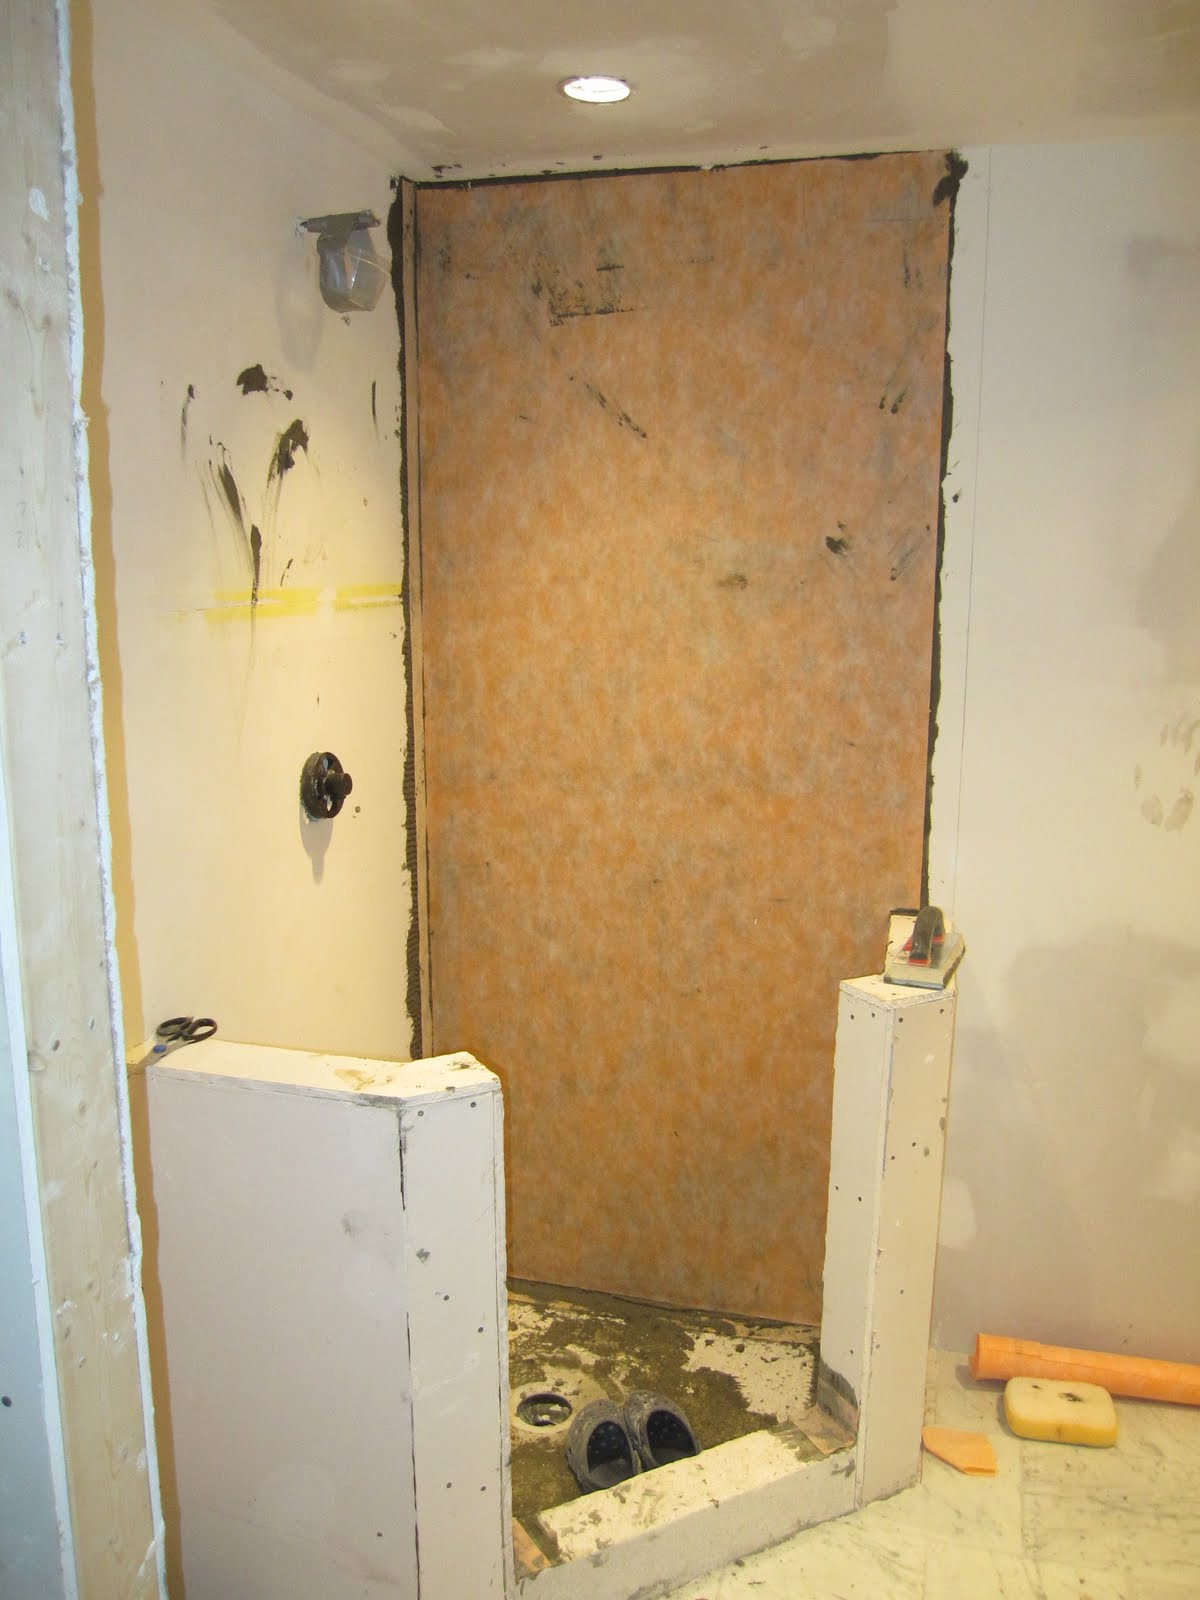
Once finished the tile in the shower, the next step was paint.  First, primer!  It made such a huge difference just having the walls all the same colour!


Please  note, these will, for the most part, be iPhone pictures, so excuse the less than awesome quality. 

After primer, paint!


The colour we chose for the walls is Ralph Lauren Bellflower Blue, which, by the time we got around to painting, Home Depot was no longer selling.  Huh.  I really love this blue.

I spent a loooooong time pressed up against the ceiling cutting in.  That's part of the reason we're putting up crown molding in most of the house.

Once we got the paint done, we tackled the vanity.  Sadly, while our floor was nice and flat, it wasn't perfectly level, so Derek had to do some fine jig saw work to the bottom of the vanity to make sure that the top was level.


Then, we pulled our frosted glass counter top out of the box and excitedly laid it on the vanity.


Only to see that, oh crap, you can see right through it! (um, duh, it's glass)  I guess that we'd hoped that the frosting would make it a bit more opaque than just translucent.

We brainstormed solutions and tossed around ideas like staining the tops of the vanity, applying some sort of coating to the underside, or even getting a sheet of aluminum or stainless steel cut to size (which I could have gotten done at work, yay for being friends with the machinists!)

Aluminum


Stainless Steel


We didn't really like either of the metal options, so next we turned to paint.  I picked up a whole bunch of paint chips at Home Depot in colours that I thought looked like glass green.  And lo' and behold, one of them was exactly the colour of plain glass (you know, when you look through the edge?)


Behr's Premium Plus Ultra Mild Mint was the colour that worked.  Thankfully, since it was such a small area that needed to be painted, we got away with just buying one of the $5 paint samples.  Two coats (and a few cat paws later) it looked absolutely perfect.  A good bead of silicone attached it to the vanity.


In the interest of keeping this post from becoming an absolute novel, I think we'll leave it there.  Next time, finish plumbing!

Wednesday, August 25, 2010

Oh, hai. Remember us?

Oh, hey, how's it going?  It's been a LONG time, but don't worry, we're are getting work done in the blue house on the corner.  Actually, we've gotten a lot done.  Sorta.  But, I can't throw it all out at you at once.

Unfortunately, someone (me) left our camera at our friends house when we went to a party there for the May 24th long weekend.  These friends also happen to live 2+ hours away.  We only just got the camera back near the end of July, so, there's a bit of a gap where our work wasn't quite photo-documented the way I'd like, but, there are some ok iPhone pictures we can share.  I'm going to take a few (2?) posts to bring the world up to date on where we are in the bathroom, and then we'll move on to what we've done in the rest of the house.

When we last spoke we'd finished laying the tile in the bathroom and had it all grouted.  The next step was tiling the shower.

 The first step in the process was mixing up some thinset to apply the Kerdi membrane to the walls and floor.  As I mentioned waaaaaay back in January we used the Schluter Kerdi system for the shower.

Image from schluter.com

The first thing that goes on is the Kerdi Band.  A 5" strip of membrane that helps to seal in all of the corner joints.  That was definitely me work and not Derek work, as it was finicky and required a small amount of patience.


Once all of the corners had been covered in Kerdi Band, it was time to put the membrane up on the walls.  Now, here is where I will fully admit that I made a mistake.  I grabbed the wrong trowel.  So instead of having a nice thin coat of thinset with the small, v-notch trowel that Schluter recommends, I grabbed the big honkin square notch one we used for the floor.  This resulted in a THICK later of thinset that didn't exactly dry smoothly, and really built up the corners.  So, always make sure you grab the right trowel!


We let the thinset set up for a few days and then got to work on the tile.  The tile we got for the shower walls is a 4"x16" white ceramic tile.  They're huge.  We played around with a few layout options and decided that we really like a running brick pattern with a 1/3 offset.  It makes more sense when you see it.

Derek got started laying the tiles and made it about 3 rows before the number of swear words quickly out numbered all other words.  Tiling, not his forte.  I stepped in and continued on.


See the pattern?  At this point, the camera-forgetting weekend happened, so the only other shower progress picture I have came from my phone.

We sort of played around to see where we wanted our row of mosaic tiles to go, just sort of taking a look as we went to see what we thought looked best.  We settled with just about eye level.


Neither of us can remember for sure how long that took, but I think it was one good, solid day of work.

The next wall had all the freaking holes in it, but, we had our diamond hole saw from doing the floor, so those were easy as pie.  

The best advice I can offer for tiling is to make sure you clean our as much thinset as you can before it dries.  We spent DAYS cleaning the thinset out from the grout lines.  The worst was in the mosaic tile.  So, even if you're tired from tiling, take the time to get the thinset out while it's easy!

The grouting of the shower was pretty easy, although it did take quite a while, and we probably mixed up too much grout at one time, but it got done.  Installing the tile on the shower floor was a fun job.  We ended up getting a special tool from a stained glass shop here in town to cut the glass mosaics on an angle.

Rotary nippers turned out to be the perfect tool for the job.  Home Depot doesn't sell them, so you'll need to find a stained glass shop, but they were only about $20. (or you can borrow ours)

Here's the final thing.  You get a preview of the wall colour in this shot, but hey, that's ok.


I love it.  Here's a closer look at the floor to.  Love that x a million.


Now we just need to get the glass guy in, and the work on this bad boy is done.  We've already installed the shower head, but I'll tell you about that in my next post, where I'll also share the store of the toilet install, and the fiasco that was our pop-up drain.