I cannot wait to have my house put back together. We'd only lived here a month before things started coming down (and by things, I mean walls), so, after being here for more than 6 months, I'm ready for the dust to be finally settled, for there to be paint on the walls and some sort of flooring other than plywood.
That being said, we're getting very close with the bathroom. We have to install the tile on the floor of the shower, grout the whole shower, paint the walls and install the fixtures. I'll touch on the tiling of the shower stall another time, for now I'll tell you the story of the floor!
Neither Derek nor I had any experience with tiling when we decided to take on this project so we turned to the best resource any DIY'er has: Google and message boards.
A question put out on the Decorating & Renovating board on The Nest led to a
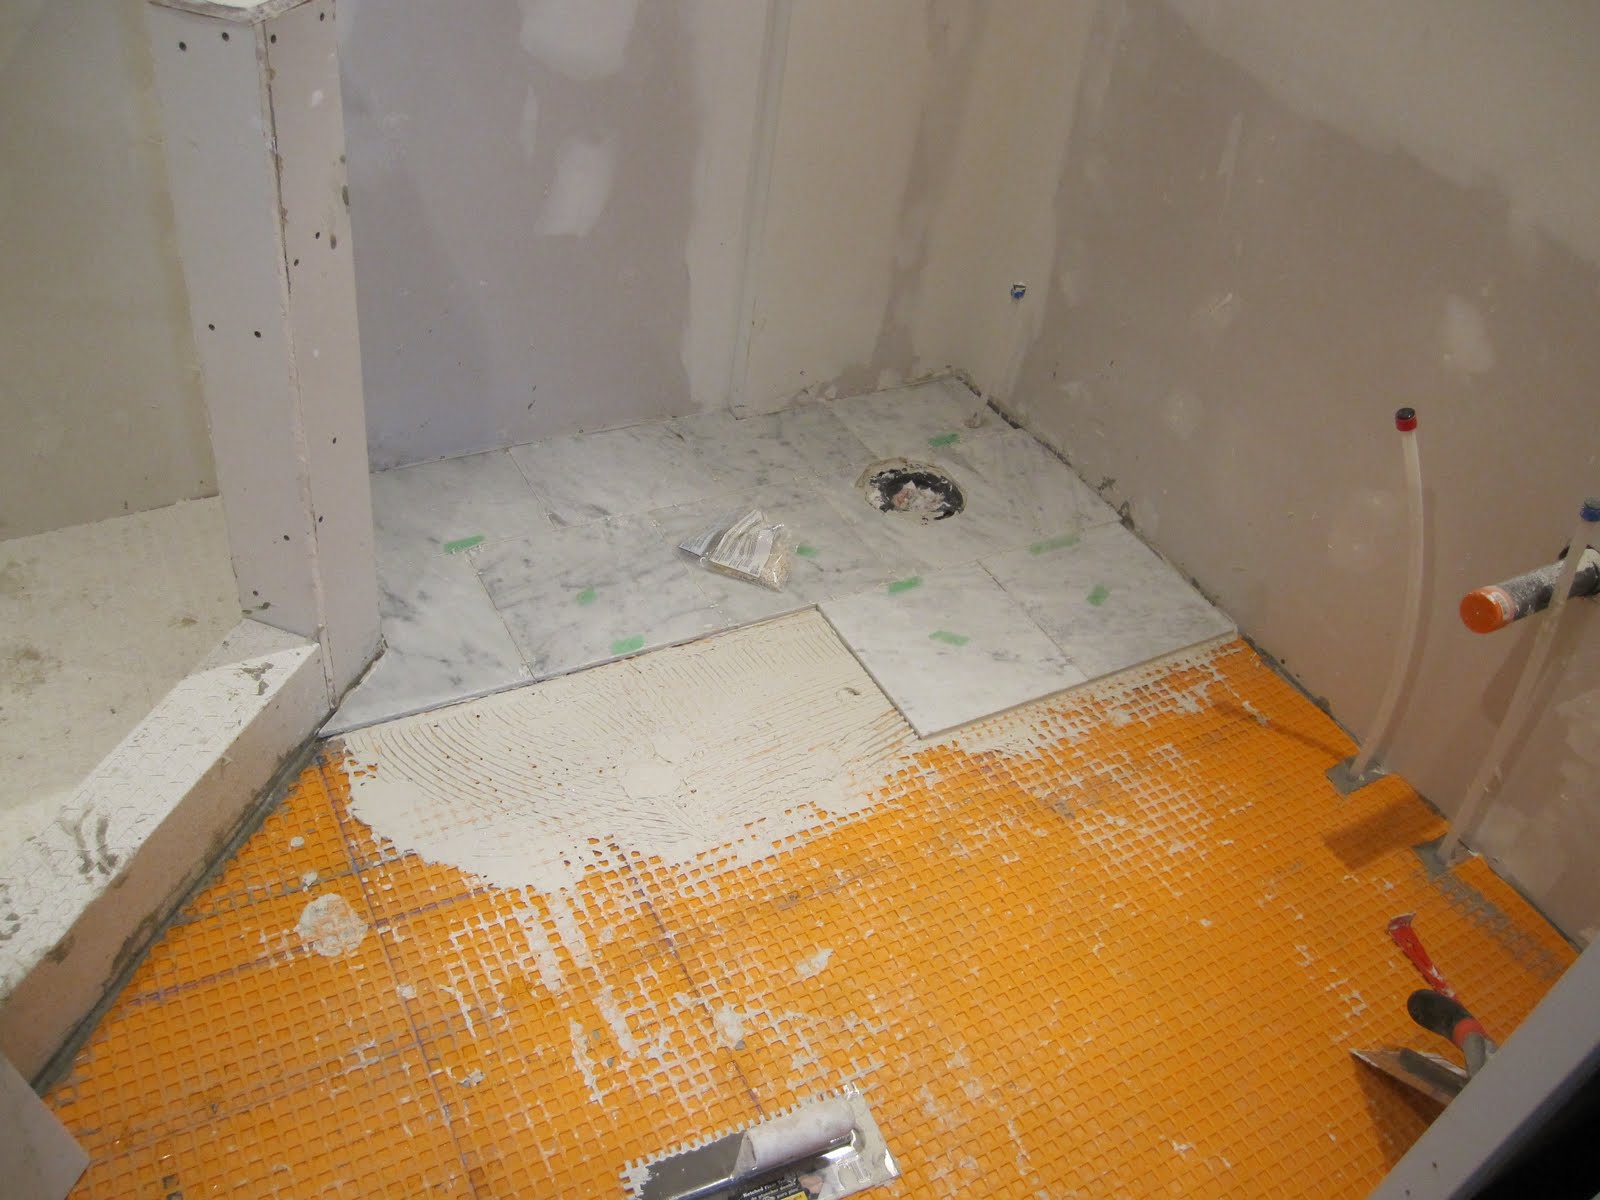
Since we planned to install marble tile, and since our floors had a bit more deflection that is generally recommended, we opted to install Ditra on the floor as a substrate over the plywood.
Anyone that watches Holmes on Homes (or any of Mike Holmes' other shows) is probably familiar with Ditra. He uses it in basically all of his bathroom renos, and well, if it's good enough for Mike, it's good enough for us.
The Ditra goes, as I mentioned, on top of the subfloor and under your tile. It acts to strengthen the floor by absorbing any movement that may occur. It also acts as a water resistant membrane. It could easily be made fully waterproof (with some of the same stuff we used for the shower) but we opted not to take that step. Just the Ditra alone provides a lot of protection.


Images from Schluter.com
It's also bright orange.
Our first step was to measure and cut out the sections of Ditra that we'd need.


Chloe helped.
After that we laid down a layer of thinset using an appropriately sized v-notch trowel and pressed the pieces of Ditra down, smoothing it out using a grout float.


We let that set for a day or two and then began planning the layout of the floor tiles.
The way we saw it, we had two options for lay out. We called them even and offset.

Even

Offset
The magic of the internet allowed us to nearly instantly poll a large group of people to find out what they thought worked best.
The results were unanimous for offset, which is good, because that's what we liked best too. It's also really great for hiding less than perfect work, which is ideal for first time tilers.
So, we laid out some guide lines (that we never ended up using because they were quickly covered in thinset) and got to work.

Bonus tip: To keep chalk lines from quickly being erased by your feet and tools, cover them over with regular aerosol hairspray!
Here's me at the beginning of the day:

We quickly worked out a great system. Derek would cut any pieces that had to be cut (on the wet saw set up in the basement) while I laid the tile. For large runs of full tile, Derek would work ahead of me and trowel out the thinset on the ground while I set and squared the tiles.
As you can see above, we opted to use white thinset for the marble instead of standard grey. As a natural stone marble is much more porous than ceramic, so it's possible that the colour of the thinset could be seen to seep through the tile. Going with white thinset eliminates the possibility of any unsightly splotches.
We kept working away in this fashion alllll day long. As some point we realized we were kinda hungry and scarfed down some grilled cheese and then quickly got back to work.

In order to ensure a good bond, we chose to not only trowel out thinset on the floor, but also back-butter each tile.
Nearly 9 hours later we were finally down to the last tile (or so we thought)

We got that last tile in place and stepped back to admire our awesomeness.
Then we realized that the two tiles right in the centre of the door were way too light. Such is the nature of natural stone, not every one is exactly the same, so we asked ourselves if we wanted to pull them up and replace them with others (thankfully we had lots of extras).
Exhausted Andrea and Derek thought that we could live with the colour variation, but we knew that Future Andrea and Derek just wouldn't be satisfied with a less than perfect job when we had the opportunity to correct it, so, up the tiles came, and down new ones went.
We got cleaned up and then promptly drove to Wild Wing and consumed more wings than a normal human should be allowed to.
We gave the floor a good day or so (ok, it was a week) before we tackled the grout. We opted to go with a light grey that matched well with the veining in the tile.
Apparently I forgot to photo-document the grouting process, but it was fairly straightforward and didn't take a ton of time. I can say though, Meka definitely approves of our tiling job!

That's all for now. Once I get my camera back (