Now that we had the vanity in place, we moved on to installing the toilet. The day we decided to do this was so grossly hot outside that things didn't exactly go as planned.
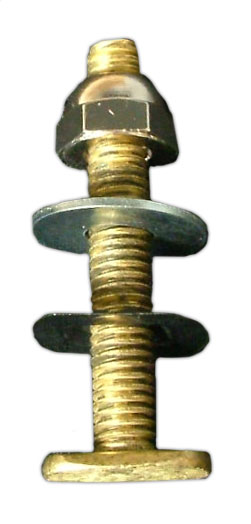
The first step in installing a toilet is to install the flange bolts.
Well, one of our flange bolts took a very unfortunate drop down the toilet drain. We'd only just taken the rag we had blocking the drain out, so sadly, the bolt was lost.
Off Derek went to Canadian Tire. That was trip number 1.
For some reason, when the plumber was here and installed the new plumbing for the toilet, it was installed a bit too close to the ground. Once we got the tile on the floor, the closet flange was below the level of the floor.

Thankfully, while we were browsing for toilets our favourite store ever (Home Depot of course) I made note of these fancy things called, ideally enough, closet flange extenders.

Basically, it's a ring of plastic that's the same shape as the top of the closet flange that's attached to your plumbing. It has a gasket material on the bottom that seals to your existing flange, and holes to screw it into your floor. Using these little pieces of awesome we were able to bring the level of the flange up to the proper level.
Getting those rings from Home Depot was trip number 2.
The flange extenders come 2 in a pack. After we put the first one down, we tired to install the toilet. Unfortunately, due to both the extreme nasty heat severely softening the wax, and the fact that just one flange extender didn't quite bring the level up high enough, the wax ring just didn't make the seal we were looking for. We didn't pour any water down the drain, but our experience from installing a toilet in our other bathroom, we know what "feel" we were aiming for.
Another trip to Canadian Tire for a second wax ring was trip number 3.
With the second extender in place and the new wax ring in hand, we got the toilet installed in no time. Yes, it might have taken a total of 5 hours from the start to the finish, but we got it done.

The next thing we tackled was installing the shower head.
The decision to take the toe tester out of the shower stall lead to a slow, constant drip from the shower head pipe sticking out of the wall. The original shower head we bought was a normal, stick out of the wall and bends down type, and would have continued to drip.
So, applying our knowledge of hydrostatic pressure and general fluid dynamics we started looking for a shower head that came on an arm of a different shape. Thankfully, Pfister had one that fit the bill perfectly. A quick special order from that place we go to all the time and some teflon tape later, we had a functioning shower head!

The fact that the shower head arm goes up above the level of where the pipe comes out of the wall is what keeps it from dripping. And bonus, we got a rain shower head!
Next step, installing the sink and faucet.
We had some issues with the drain for the sink. When we ordered the sink, drain and faucet back at the end of January, the lovely lady at Home Depot suggested we get the pop-up drain, since it's a bathroom, and, well, having the ability to plug the sink is a good thing.
When the drain finally came it we just put it in the back room with everything else.
A few weeks ago (so, like, 7 months after we'd ordered the drain) we went to put everything together, and well, the drain would not work. Because we got an overflow sink we needed a drain with a longer drain pipe in order to accommodate the extra height of the sink. Well, this one just wouldn't do.
So, we took it back to Home Depot and went to see the nice lady in the kitchen and bath department. I was inadvertently bitchy to her, and I felt bad. Turns out, the company sent the wrong part. Our lovely Home Depot associate had done everything exactly correctly. She took down our info and had the correct drain to us in a matter of days.
We finally got to sink install time. A butt load of teflon tape and silicon caulking, and some McGyver style improvising later, we have this!

I'm not 100% sold on the towel holder thingy yet, but attaching one to the wall might be tough. The pocket door is immediately to the right of the sink, so it could go there, but it might be tricky to install securely.
That's about it. All we have to do now is a few paint touch ups, clean up some silicone from various spots and get the glass guy in. Oh, and hang the mirror. Right now we're focusing on getting the dining room finished. Just last night we painted, but there's still a lot to be done.