Thursday, December 15, 2011

The Back Room - Rocking Out The Fireplace

The fireplace, oh how I love the fire place. I don't think I ever shared any of my fireplace inspiration pictures, so here's one of the main ones.


I love this fireplace for many reasons, the main two being the stacked stone and the dark wood mantel.

First step was getting one of our friends Bill the Furnace guy to come by and spenf a Saturday with Derek hooking up the gas to the fireplace. Once that was done we secured the box into place in the frame and set out in search of some sort of stone tile for the face of the fireplace.

We visited The Tile Shoppe in Mississauga and found a really great deal on some stacked slate ledgestone.


So we laid down a piece of melamine to protect the floor, screwed in cement board and got to work!


While I'm normally the tile person in the family Derek tackled most of this project himself, and I must say, he did a fantastic job.

The space there at the top was left empty to accommodate the mantel Derek planned on building. Once the tiles were set Derek framed out the top portion of the wall, setting it back the somewhat random distance I deemed to be appropriate.


From there it was a matter of drywall, trim and painting. Then one night while I was out with some friends, Derek worked his magic and used some lumber we had around the house to create a mantel that looks like it's one giant piece of wood.

We picked out a stain that's fairly close to the colour of the floor and got the first coat on.


And then we waited.

And waited.

And waited some more.

And then we finally added the second coat of stain.


Since then Derek has added two coats of clear coat and it's looking really really nice.  Here you can see it decked out with an assortment of Santa's and other Christmas gear.  It's hard to see the gloss coat, but trust me, it's there!


This room is where we spend the majority of our time in the evenings hanging out, so having the fireplace is really wonderful.  We can keep the bulk of the house set to a fairly low temperature and then just flip on the fireplace if we get chilly.  Maybe in the future we'll install a fan to help push some of that heat around, but for now, it's nice to enjoy our cozy little family room.

And yes, I realize I need to clean the glass.  Hush now.

Sunday, November 20, 2011

The Back Room - New Sits

When we last looked at the back room it was January and we'd framed in the fire place,


painted the walls,


hung curtains and moved in the sort of crappy, not at all matching, one piece of a sectional couch.


Since then we've come a looooooooong way and have nearly finished the room.  All that's left to do are a few finishing decorating touches and maybe some furniture reorganization.

First up on the list, new furniture and a rug!

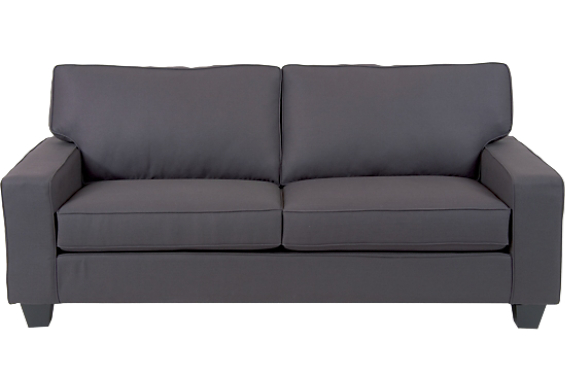
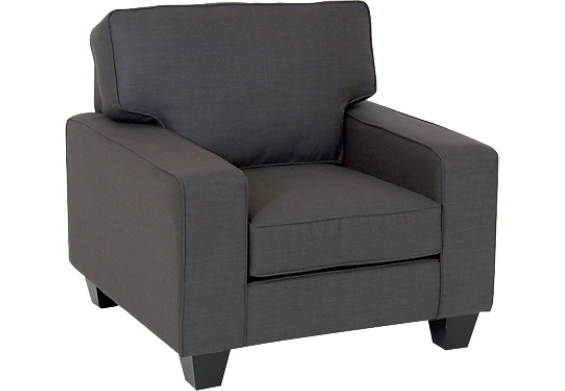
We knew that out space was fairly limited so we went out looking for a couch and 2 chairs.  Ideally we wanted some sort of slipper chair and spent a bit of time shopping around.  Eventually we decided on this sofa, the matching arm chair and coordinating accent chair from The Brick.


I wasn't 100% sold on the pattern on the slipper chair, but that can always be covered/changed in the future.  The colour of the sofa and arm chair is called Graphite and is a really great grey/brown mix that falls nearly perfectly between the colour of our floors, curtains and walls.

Around the same time we also picked up a laaaarrrrrggeeee shag rug from Home Sense. 

Here are Derek and Chloe modeling the new additions.


Next was finishing up the fire place!

Saturday, November 19, 2011

Updates

Um, wow, it's been a while since I've updated here, nearly 9 months. That's long enough to grow a person!

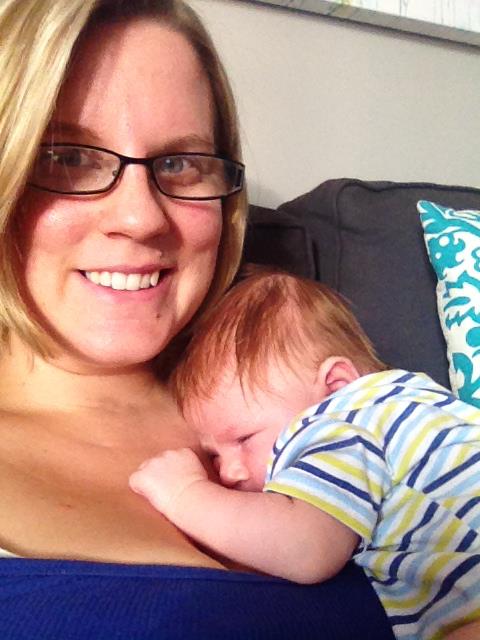
Speaking of growing a person, that's the biggest thing on the DIY list at the blue house on the corner right now. Yup, I'm knocked up. 17 weeks and counting.


the little one at 12 weeks

So, as you can imagine, we've got quite the deadline for the many many many projects we've got on the go. I'll try my best to stay more up to date with the blog, as we should be getting a lot of work done over the next 23 weeks. The next few posts will be a lot of catch up from where we last left off with finishing the floors.

So, in the coming days look forward to posts about:

- the backroom/fireplace
- adding faux wainscotting to the dining room

- painting stripes on the walls in the smaller guest room
- replacing the giant window in the old sitting room with a smaller counter height window for the kitchen
- kitchen plans
- how not to hang frames on a photo wall
- tiling the kitchen
- building cabinets

and much much more as we work our way through the house!

I can't guarantee they'll come in order, and I can't promise I won't throw in a post or two about what's happening in the house right now, but, I will try to be better!

Saturday, February 26, 2011

Floor!

Well, the hardwood is pretty well done on the main floor.  And oh em gee it is so nice.  After living with plywood floors for over a year, any floor would have been welcome, really, but this stuff is just quite superb.

With the help of the very talented Eva Kovalcik of Atlanta, GA we now have a plan for the new kitchen.  Looking at that plan (which I'll share on another day) and the layout of the rest of the house we decided where we wanted to lay tile for the kitchen.  Once we had that figured out, Derek got right to work laying down the rest of the hardwood.


It took us around a day and a half to finish up and man we're a good team.

When you're using the random length boards there are a few "rules" to keep in mind.  Between one row and the two behind it you don't want any joints within 6" of each other, and you want to keep a good mix of long and short boards.  So, picking out the right size boards is sort of like a puzzle, and I'm never one to shy away from a puzzle.  I may have exclaimed a time or two (after laying out a perfectly spaced row that created very little waste) "I'm good at this game".  I would get the next row or so of boards ready while Derek came behind me with the stapler.  Working together we were able to just fly.

Here's what it looks like now.


Derek still has a bit of work to do on the stair nosing going towards the back door, and the baseboard still needs to go down, but we're starting to get there.

Now, to get going on the kitchen!

Monday, January 17, 2011

Finishing Touches

As promised, I'm going to share the (mostly) finishing touches on the back room.  I apologize in advance for the crappy iPhone pictures.  I, yet again, left our camera at a friends place.  Whoops.

First up, the fire place.  This is more kinda than mostly finished, but still, it's very important.

When we first moved in the house had an old stove style gas fireplace.


Gross, right?

Using one of our connections we were able to get a brand spanking new Lennox gas fireplace for only $700.  Comparable fireplaces in stores around us were easily $1500, so we got a really, really good deal.

We wanted to keep the fireplace in the corner to maximize function in the room, so, following the instructions, and using our big ol' brains, Derek got the framing done and set the fireplace in it's new home.


Isn't that better?  The only change that's been made since then was the addition of our Christmas stockings and some lights.  We'll be calling up Bill the Gas Guy soon to help us hook this guy back up.

Next up was paint.  Like our previous paint choices we wanted something that went well with all the other colours in the house.  Since you can see all the other colours on the main floor from the back room, it was important to us that it flowed.

We knew we wanted to go with a grey, so I picked up about a million different swatches and we started eliminating.  In the end we settled on Ashes from the Behr Premium Plus Ultra line.


I don't have any in-process painting pictures, so we'll move right along to floor!

We shopped around a bit for our flooring, going back and forth between dark flooring and medium flooring and back again.  In the end we settled for red oak flooring in a stain called Cappuccino.  It was actually a last minute decision.  We'd brought home a sample of red oak in the stain Walnut and were set on ordering it, but decided to take a look before we finalized the order at the next lighter stain colour.  I'm really glad we did too, because the floor we ended up with is just perfect.

Since there was still a good bit of work to do in the front half of the house, Derek started the flooring install just before the bathroom.


We worked together and the floor went down pretty quickly.  One of us would pick out the next row or so of boards while the other nailed them down.  We switched off a few times and in one night we got the hallway by the bathroom and about 2/3 of the back room done.  


We then finished that up the next day.  By then, it was Christmas!

Over the break between Christmas and New Years I spent a about 2 days putting a second coat of paint on the walls and caulking and filling all the holes/joints on the trim, and then priming and painting the trim out with a nice, bright, shiny white.

A set of brown-ish curtains from Home Depot later and we were ready to move the couch and TV into the room!


So, that's where we're at now!  We're officially moved into the back room as our living room, and the old living room is now the pre-kitchen.  It took Derek approximately 37 minutes to start tearing the walls down once we had the couch moved out.

Right now we're in planning mode for the kitchen, which will be the next big thing on the list.  Once we at least get a plan drawn up for the kitchen we can start moving along with laying the rest of the floor.

Saturday, January 15, 2011

Up goes the ceiling!

I thought I'd break this up into a few different posts, but, well, we might as well just get this over with, right??

The last time I updated this thing (I promise to try and do that more often now!) we'd removed the hump between the house and the back room and put up all of the insulation.  The next step from there was to get the vapour barrier up.

Since we were planning on reusing the potlights that were already in the room, we picked up some plastic "buckets" to put around them.  Up they went along with some ventilation panels to put up at the roof.


From there we added Roxul insulation above the plastic and between the beams in the ceiling.


Then up went the poly for vapour barrier.


By this point you could really feel a difference in this room.  This was around the end of October and it was starting to get a bit chilly outside.

We had decided that we would not turn on the furnace until we at least got the vapour barrier up in the back room, so this was a big day for me.  That is, until I went to turn on the furnace.

Yup, nothing.  The thermostat was all lit up, the furnace was turned on, but it would not fire up.  Crap.

So, we spent another week in the cold, and had a call in to Colin's friend Bill, who just happens to be a gas guy.  I decided to double check absolutely everything before Bill came over.  I pulled the face off of the thermostat and lo' be behold, the pins that connect the face to the actual wires that run to the furnace were bent.  Apparently we hadn't actually used the furnace since we did wall tear down and thermostat relocation back in April.  So, crisis averted, heat back on, no gas guy required.  Yay!

When we'd pulled down the ceiling in this room we were rather perplexed by why they'd put up 2 layers of drywall with some strapping in between.  Well, as the first sheets of drywall went up with Tim's help, it became glaringly obvious.


What?  You can't see the problem?  Here, let me try and help.  The green line below is straight.  The blue line traces the contours of the ceiling.


Ok, so it's still hard to see, but, longs story short, a ceiling should not have "contours".

So, off to Home Depot the boys went, and up went a dropped ceiling.  The guys decided it would be a lot easier to drop the ceiling than to attempt to level up each joist individually.


The guys finished up the carpentry and got the drywall up on the ceiling.  I think they might have finally called it a night around 3 am?

Bright and early the next day we were up and having breakfast.  Tim had to be on the road by 10am and we wanted to make use of his truck to take advantage of a buy-2-get-1 sale on trim at Rona.


That's what $1000 worth of trim looks like.  Not that much, eh?

I guess I'll leave it there for now, but I promise to show you the (mostly) finished back room soon.